
Thank you so much to everyone who left comments and suggestions re making soap with milk...I am going to try make some in the coming week!
Today's post is seriously photo-heavy, be warned! I have finally scraped together the courage to tackle the Two-Socks-at-a-time on one circular needle (Magic Looping) tutorial, thinking that you may want to knit a funky pair of socks for someone you love (yes, I imagine that you will need to have a fair amount of ♥♥♥ tucked away for someone you decide to knit socks for...socks are a labour of Love!). Also, I haven't blogged about knitting in ages, so if you've had withdrawl symptoms...enjoy! Here is the first installment...the Toe. I am assuming that you know how to do Judy's Magic Cast On...if you want to refresh your memory, check here. You should also have a good idea how to Magic Loop...here is a tutorial, and an update.
 I am basing the stitch count on a sock that will generally fit a medium sized woman's foot, which tends to be around the 64 sts per sock, if knitted in sock yarn and a size 2.5mm circular needle. Please, please make sure that you have a decent set of circs...if your needle/cable joins are not smooth, you are so going to suffer knitting socks! I use either Addi's or KnitPro's...their joins are fabulous! I would recommend at least a 40in circular needle. If your sock has a different stitch number requirement, don't fret, the techniques are exactly the same, just follow the directions for your number of stitches.
 Right! Some basics first...
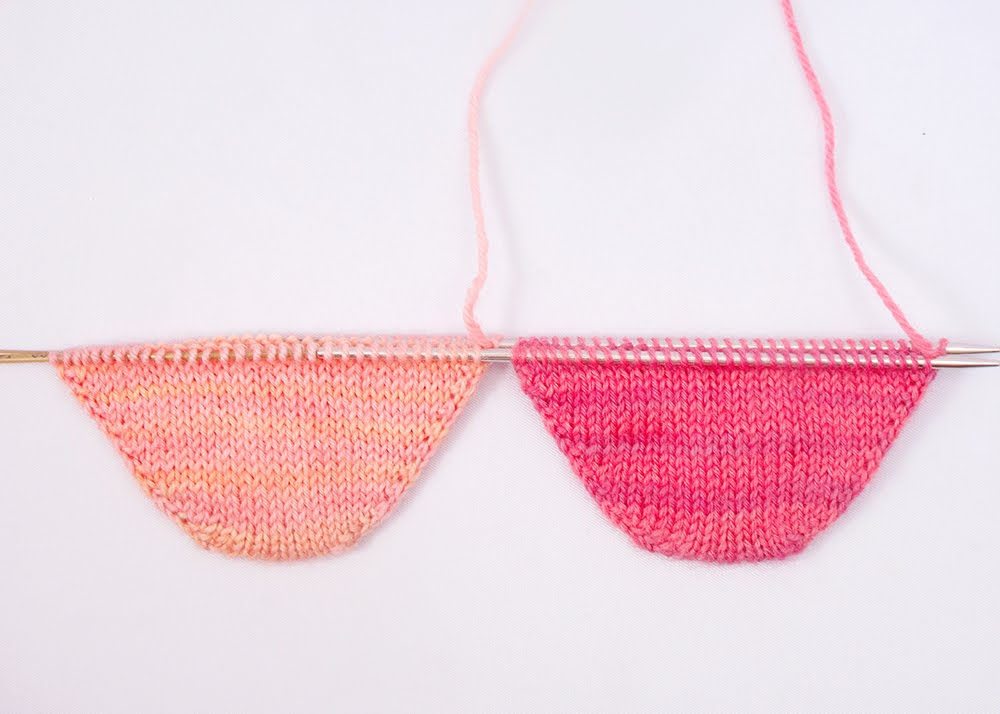
In the photo above, you can see both sock toes, with the last of the Toe rounds completed. Remember that your sock's total number of stitches are divided over two needles, ie half on one needle, and half on the other, so 32sts on one needle, and 32 sts on the other (total =64sts per sock). I have arbitrarily decided that I am going to use the first-to-be-knitted 32sts as the SOLE STITCHES (of the Right Sock). The same applies to both socks, which are made in the same way. That means that when I start knitting a round, I am always going to be knitting the sole stitches first, and always starting with the right sock. So, if you look at the photo above, you'll see that you are knitting 32 sole stitches of the Right Sock (1), then 32 sole stitches of the Left Sock (2), {turn your work}, then 32 Instep Stitches of the Left Sock (3), then 32 Instep Stitches of the Right Sock (4). I have used two different coloured yarns so that you can easily see which sock you are knitting on. The dark colour is the Right Sock, and the light colour is the Left Sock.
The toe directions I am going to use, are based on my personal favourite toe shape. It is a semi rounded toe and very comfortable. Again, when you have the technique down pat, you can substitute whichever toe you prefer.

What if you have a fancy Fair Isle socks set you are wanting to knit? I like to have the pattern represented on a graph, with the two socks split open (so to speak), as seen above. NOTE: The numbers under each section of the socks! Although you will knit in the following order:1,2,3,4, when referring to the actual knitting photo, in the graph you have to skip the Right Sock Instep graph directions, ie STICK TO THE 1,2,3,4 order! I have loaded the above photo as a bigger size than I usually do, so that you can print it out and take a closer look at where the increases are situated. I use a Kfb to make an increase, and have shown which stitch should have a Kfb, by the green squares on the graph.
 Let's take a closer look at the Right Sock. You've cast on 16sts (8 sts on each needle), and are ready to start Round 1. The first 8 sts on your needle are the SOLE stitches. Notice in the graph, that the 1st stitch is green coloured. This means you will do a Kfb (Knit Front and Back of stitch) IN THE FIRST STITCH ON YOUR NEEDLE. You then knit 5 stitches as usual. Next another green coloured stitch appears, so you'll do another Kfb into that stitch. Note that this is the second last stitch of the 8 stitches set on that needle. This pattern (Kfb,K to second last stitch, Kfb into second last stitch,Knit last stitch), repeats for every side of your socks (Right Sole, Left Sole, Left Instep, Right Sole), FOR THE FIRST 5 ROUNDS. Thereafter, the increases occur every alternate round, until you have a total of 64 sts for each sock (32sts on each side for each sock).
When you have 64 sts in total for each sock, you will knit each subsequent round, until your sock is 1 inch shorter than your foot length.
Right...let's get started!

You'll cast on for the LEFT SOCK first. Using Judy's Magic Cast On, cast on 16 sts (8sts on each needle). Then cast on 16sts for the Right Sock, again, there will be 8sts on each needle.
 Your work should look like the photo above. Notice that I have pulled the Tail Yarns in one direction and the Working Yarns in the other. It is very important that you are familiar with where your Tail Yarn should be relative to your working yarn. The first Round "locks" your Tail yarn into place, but only if you have placed it correctly. Look here to check if you are unsure. Swivel your work 180 degrees to the right, which will have your working yarns at the top of your needles now.
 Above you can see that the needles are now pointing to the right hand side. Take a closer look at the actual stitches. When you do a Magic Cast On, you will actually have "knitted" the cast on stitches, with one side showing Purl Bumps and the other a Knit stitch configuration.
If you roll your needles over, you can easily see the Purl "bumps", as shown above.
 Roll your work back, so that the "knit" side is facing you again. Above, I have indicated the first stitch you will knit into, doing a KFB (remember the graph? :) )
 At this point your needles are still aligned and together. Carefully pull out the bottom needle towards your right. This is the needle that you are going to start knitting with. Be careful not to pull it out too far, or your Magic Loop will be undone!
 Above you can see that I have made the first Kfb, and now have two stitches on my RHN. There are still seven stitches left of the Right Sock Sole on my LHN.
 Knit 5 stitches...you will have reached the second to last stitch on your LHN (of the Right Sock).
 You need to Kfb into the second to last stitch.
 Now you have one stitch left of the sole of the Right Sock...knit it.
 Ok, so you have made two increases (2 x Kfb), so you'll now have 10sts on your Right Sock Sole.
 Drop the working yarn of the Right Sock, and pick up the working yarn of the Left Sock. You are going to do exactly the same sequence as for the Right Sock Sole stitches.
 Kfb of the first stitch on your LHN of the Left Sock. This gives you two stitches on your RHN (of the Left Sock Sole).
 Again, knit until the second to last stitch, then Kfb into it.
 One stitch left on the LHN...Knit it. Right, you should have 10sts on your RHN (Left Sock Sole).
 Swivel your work through 180 degrees to the right as shown above.
 Above, the work has been rotated through 180 degrees, with the 10 sts sections at the bottom.
 Push back the cable as shown, towards the left , so that your needle points are next to each other.
 Your work should look like the photo above.
 Now pull the bottom needle out towards the right. This is the needle that the working yarns are coming off of. Remember that the "knit" side of your work is still facing you as you work.
 The needle that you just pulled out towards the right, becomes the RHN that you will knit with.
 You are starting to knit the Left Sock Instep stitches. Kfb into the first stitch on your LHN.
 Kfb completed...you have two stitches on your RHN.
 Now Knit 5 stitches. You will have reached the second to last stitch (just as before :) ).
 Kfb into the second to last stitch.
 You have one stitch left of the Left Sock Instep stitches.
 Knit this last Left Sock stitch.
 You should have 10sts on each side of the Left Sock now...well done! You have finished Round 1 of the Left Sock :)
Repeat exactly the same process for the Right Sock Instep stitches...Kfb into first stitch, K5, Kfb into second to last stitch, K the last stitch.
 Good! You have finished Round 1 of both socks!. If you look at the photo above, you can see that it is very much the same as the photo after you finished the Sole Stitches of both socks...back then you swiveled your work 180 degrees to the right. NOW you are going to flip your work instead, so that the "purl" side is facing you. Tip: You will know that you have finished a Round when the Tail Yarns and the Working Yarns are on the same side of your sock.
 Above, you can see that the work has been flipped to the right, and you can clearly see the "purl" side facing you. Take note of where your working yarns are. They are coming off the TOP NEEDLE now. An easy tip to remember: From Round 2 onwards, the needle that you pull out to the right hand side in preparation to start knitting again, ALWAYS has the working yarns coming off it!
 Lets go through this again...push the cable backwards towards your knitting, so that both needles lie next to each other.
 Now pull the other needle out towards the right hand side (if you have reached the end of a side of knitting, the needle you pull out will always have the working yarns coming off of it!!!)
 It is very important that your working yarn lies above the other needle tip when you start knitting ...make sure it isn't tucked under!
 Ready to start Round 2? If you squish your LHN and and the cable lying next to it together, you'll see the purl bumps "pop" in and the "knit" side will be showing. (If this doesn't happen, then use your finger to push the purl bumps down between needle and cable). Above I have shown the first stitch of Round 2 that will be knitted, using a green arrow. Remember your graph? You still need to start with a Kfb into this stitch.
 Above, the Kfb is done, you have two stitches on your RHN.
 Now continue exactly as you did in Round 1...Again, you are starting to knit the Right Sock Sole stitches. Kfb into 1st stitch, Knit until you get to the second to last stitch, Kfb into the second to last stitch, Knit the last stitch. Repeat for the Left Sock Sole stitches.
 When you have completed the sock sole stitches, your work should look like the photo above. You should have 12 sts for each sock sole. Flip your work again to the right.
 Just as before, thread your cable backwards so that your needle points lie next to each other. Then pull the other needle out towards the right hand side (again...this is the needle that has the working yarns coming off of it).
 You are ready to start knitting the Instep Stitches of the Left Sock.
Edit: Continue to knit these and the stitches of the Right Sock that follow, just as you did before...follow your graph and make sure you keep track of your rounds :) The process is exactly the same for each round...
 Above I am starting Round 3...again, starting the Right Sock Sole Stitches. See that the working yarns and the Tail Yarns are on the same side of the socks? That is a reminder that you are starting the beginning of a new round :) Kfb of the first stitch, just as before.
 You essentially continue in exactly the same manner, until you have completed 5 Rounds of knitting. Take a look at your graph...after the fifth Round, you only do increases every alternate round. As you complete rounds, you'll see the little sock toes starting to take the shape of a little pocket :)
 Once you have reached 64 sts for each sock, you are just going to knit each round without any further increases. Keep going until your work (when fitted over your foot), is one inch shorter than your foot length.
I like to tie a loop of different coloured yarn to the toes at the side where the tail yarns originate. When your sock forms a pocket, you can tuck your Tail Yarns into the pocket, and still always know where you are in your knitting. When you have the different coloured yarn ties on the RIGHT, your Round is done.
Ok, that was a long post! I hope that things are clear and that you'll all be inspired to start knitting Two-at-a-Time :) Please let me know if there are any bits that are unclear or if I have made any errors...feedback is always appreciated!
♥Heidi

18 comments:
Perfect tutorial!!!! Thank you so much for all your time.
Meredith
Thanks Heidi, for sharing all your beautiful things! I made you're crochet rose (as you can see on my blog :-)) but I didn't remember from which blog I took the patron, now I remembered and will share you're link with it! Thanks a lot for your beautiful blog!
Oh my Gosh, this tutorial is awesome!!! Thank you so much!!!
Wow, great tutorial, if only I could knit :-)
I finished Lollo Bear, but I lost my bear needle, so will have to look for that one to put Lollo together.
just started my cast on - my first toe-up ever, and honestly it's so easy I still cannot believe it - thank you SO MUCH !
can't wait for part II....
Thanks a lot! When will part to come??
Thanks very much everyone! I am really pleased that it has been useful :) Margy, I would LOVE to see your Lollo Bear...please post pics for us all to see...you can add them to the Lollo Bear Projects page :)
I have always wanted to try to do 2 socks at a time.. THANKS so much, I do cuff down using magic loop now, so I know the basic concept, so Now I can try 2 at a time! many many thanks, i will keep you posted on my progress!
Happy Knitting
carole
Oh, my goodness! What a detailed blog post! Thank you SO very much. I can't believe you took all the time to go so carefully through each step - and with PICTURES!!
Thank you!
Che brava!! Ho cercato e cercato per molti giorni e.....finalmente ti ho trovato: il tutorial e' chiarissimo e provero' subito a lavorare le mie calze assieme come hai spiegato. Ti ringrazio tantissimo!!! Non sono molto esperta ma mi impegnero'! buona giornata!!!!
Che brava!! Ho cercato e cercato per molti giorni e.....finalmente ti ho trovato: il tutorial e' chiarissimo e provero' subito a lavorare le mie calze assieme come hai spiegato. Ti ringrazio tantissimo!!! Non sono molto esperta ma mi impegnero'! buona giornata!!!!
brava!!! ho cercato da molto come lavorare due calze assieme e ora sembra molto facile con il tuo tutorial. Ti ringrazio tantissimo e iniziero' subito il mio lavoro, anche se non sono molto esperta. Grazie ancora e complimenti per il blog: è così colorato che mette allegria||||
Thank you sooo much for all the trouble u took its very helpful thanksss
It works! Yay! I have troubles knitting up the second sock so I figured it would be a nice plan to knit two at the same time. It's my first time toe up too and with this explanation it's easy! Thank you very much!!! ♥♥♥
PLEASE, please, please post on how to turn the heel on these socks. The pattern I have been following uses short rows that are wrapped and I'm getting little holes.... Your post is so clear I'm sure I could follow your instructions. I've watched dozens of youtube videos but I'm still not getting it!!!
I have made socks before with dpns and two circulars, and wanted to try the magic loop way. Your tutorial was great! Not nearly as hard as I had feared. Thanks for all your hard work in putting it together!
Wow! This must have taken soooooo much time! Its AMAZING! Thank you so much! Helen
Heidi your instructions for 2at a time socks are amazing. I was .so afraid to try until I found your blog. Thank you
Scottye
Post a Comment